Introduction:
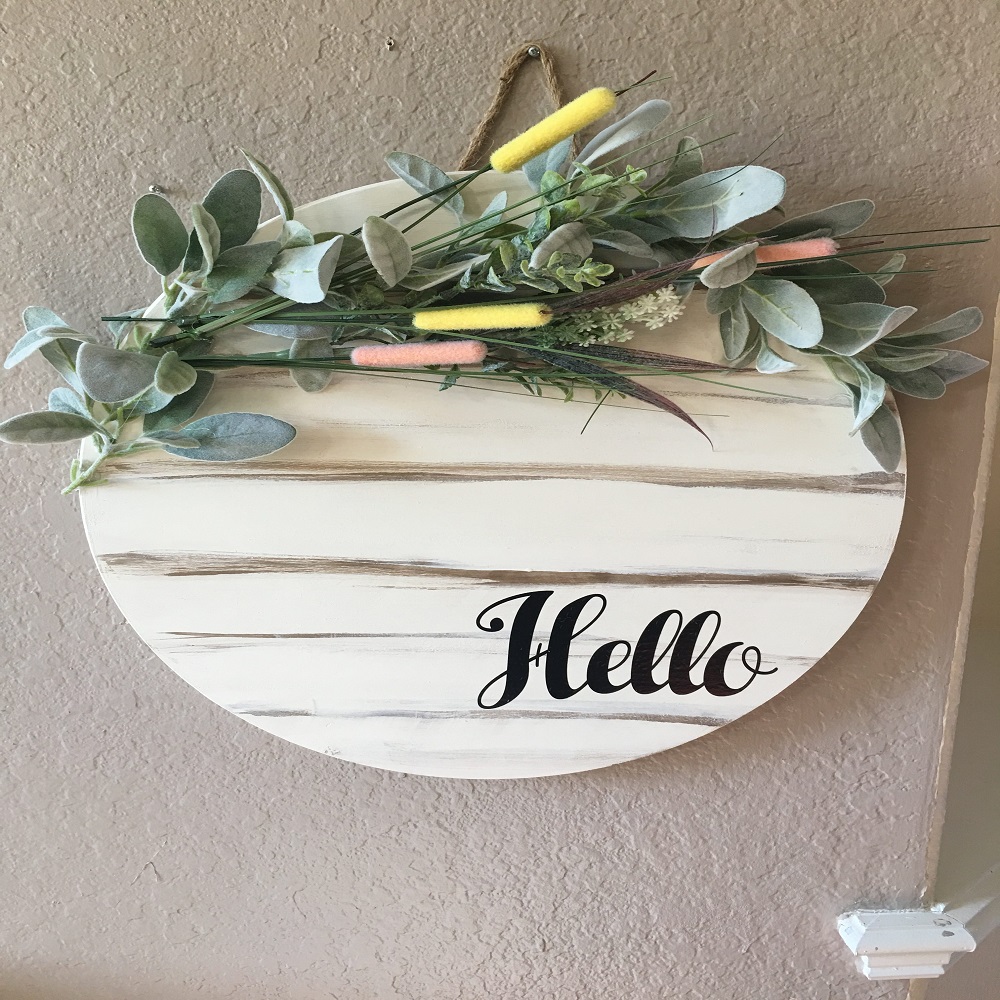
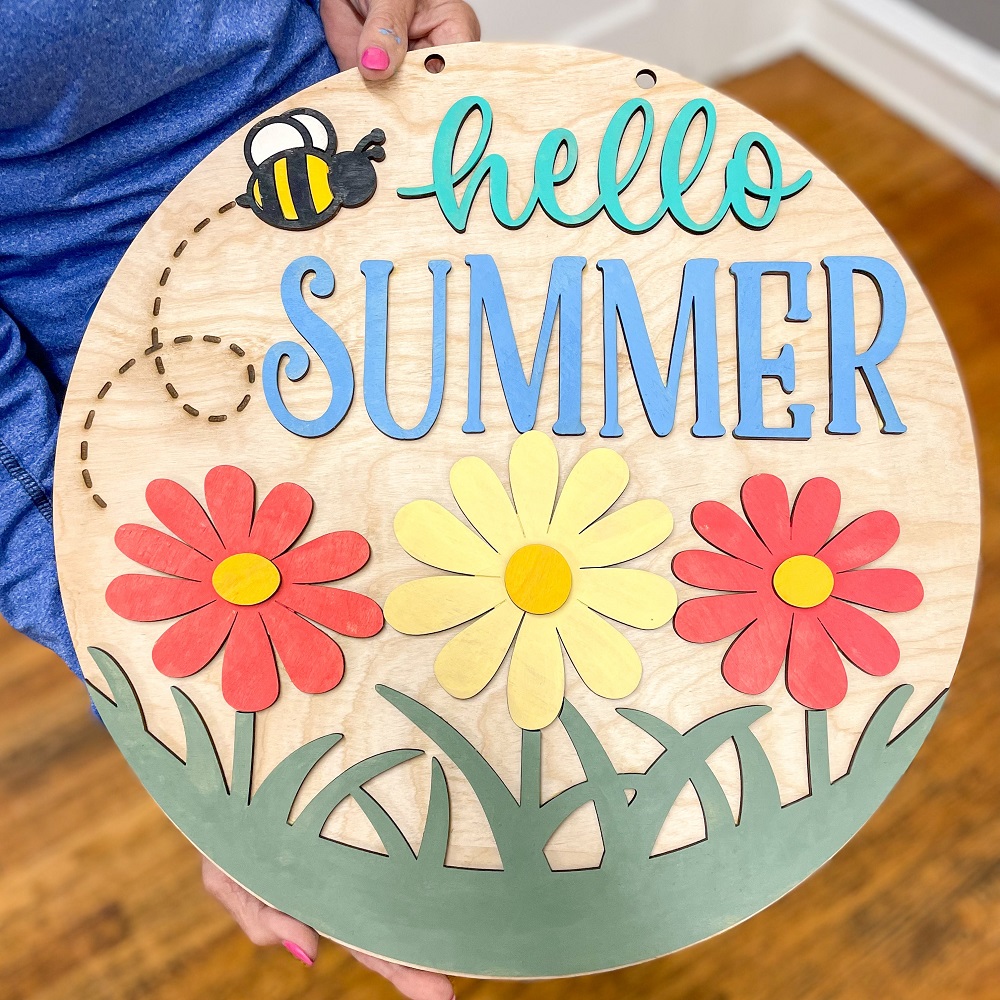
Diy door hangers are a delightful and creative way to add a personal touch to your home, greeting guests with warmth and reflecting your unique style even before they step inside. Whether you’re looking to spruce up your entryway for the holidays, celebrate a special occasion, or simply want to infuse some charm into your living space, a DIY door hanger is an excellent project to undertake. This comprehensive guide will take you through each step of creating your very own personalized door décor, ensuring that your finished product is both beautiful and functional.
Your entryway is the first impression guests have of your home, and it deserves just as much love and attention as any other part of your living space. A simple yet impactful way to elevate this area is by crafting a custom DIY door hanger that not only adds a personal touch but also sets the tone for your home’s style. This easy weekend project requires minimal materials, basic tools, and a dash of creativity to completely transform your entryway from mundane to magazine-worthy. So, roll up your sleeves, gather your supplies, and let’s dive into this fulfilling DIY adventure!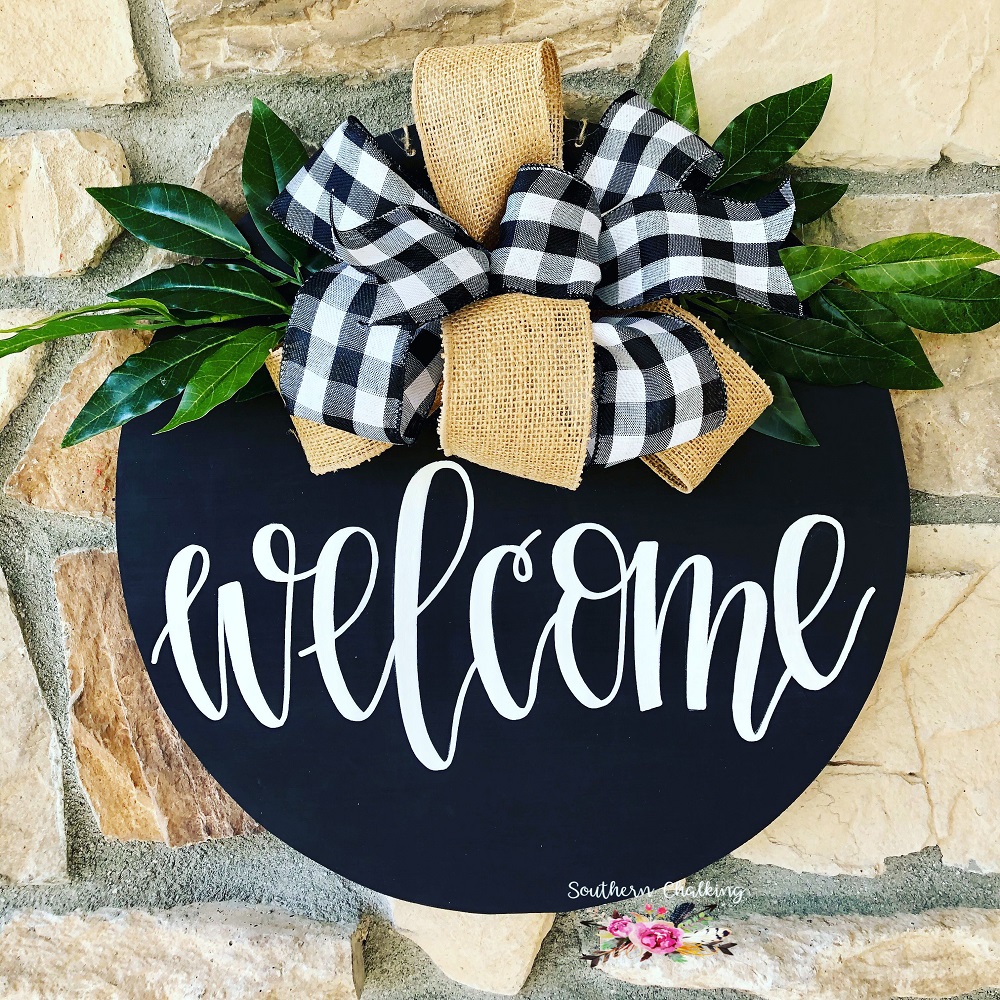
cards
Materials You’ll Need:
- Base Material: Choose a sturdy material for your door hanger’s base. Common options include wooden plaques, thick cardstock, or even recycled materials like old cabinet doors.
- Decorative Elements: Gather paints, markers, stickers, stencils, or any other embellishments that resonate with your design theme. Don’t forget about natural elements like dried flowers, twine, or seashells for a rustic or coastal feel.
- Hardware: You’ll need a hook or ribbon for hanging your creation. Consider the weight of your door hanger when selecting hardware to ensure it can support the finished product.
- Adhesive: Depending on your materials, glue, double-sided tape, or a hot glue gun might be necessary to attach various elements.
- Protective Gear: Safety first! If using paints or a hot glue gun, have gloves and safety goggles ready.
- Paintbrushes and/or sponge applicators: For smooth paint application or distressing techniques.
- Sandpaper (optional): For distressing wooden surfaces or smoothing edges.
Plan Your Design
Start by sketching out your design ideas on paper. Decide on the theme, color scheme, and any specific messages or images you’d like to incorporate. This planning stage helps ensure that your final product matches your vision.
Prepare the Base
- Cleaning: If using a wooden plaque or similar, clean it with a damp cloth to remove any dust or debris.
- Sanding (if needed): Smooth any rough edges or surfaces with sandpaper, especially if you plan to paint or stain the wood.
- Priming (optional): Apply a primer to the base material, particularly if it’s porous, to improve paint adhesion.
Paint and Decorate
- Base Coat: Apply your chosen base color evenly, allowing it to dry completely before proceeding. Use multiple thin layers rather than one thick layer to avoid drips.
- Design Work: Once the base coat is dry, you can start adding details. Use stencils, freehand painting, or apply stickers/decals according to your design plan.
- Embellishments: Attach any additional decorative elements using the appropriate adhesive. Be mindful of balance and spacing as you work.
Add Personal Touches
Incorporate personalized elements like family names, monograms, or special dates to make your door hanger truly unique. Handwritten or hand-painted details add a heartfelt touch.
Finishing Touches
- Sealant (optional): To protect your door hanger from weather and wear, consider applying a clear sealant, especially if it’s made from porous materials or will be exposed to the elements.
- Hardware Attachment: Affix your chosen hanging mechanism securely to the top or back of your door hanger. Test its strength before hanging.
 Hang and Enjoy
Find the perfect spot on your door or wall to display your new masterpiece. Stand back and admire how this personalized touch enhances your home’s ambiance.
Tips for Success:
- Practice Patience: Allow ample drying time between layers and steps to prevent smudging or peeling.
- Keep It Simple: Sometimes less is more. Overcrowding your door hanger with too many elements can detract from its beauty.
- Get Creative with Recycling: Repurpose old items like doorknobs, scrap fabric, or even broken jewelry pieces to add a unique touch.
- Experiment with Textures: Mixing textures (e.g., smooth paint with rough burlap) adds depth and interest to your design.
Creating a DIY door hanger not only results in a charming piece of home décor but also provides a sense of accomplishment and a fun activity to enjoy alone or with loved ones. With a bit of creativity and following these steps, you can transform your entrance into a warm and welcoming reflection of your personality and style.
Materials You’ll Need:
- Wooden board or a pre-made door hanger shape (can be circular, rectangular, or any desired silhouette)
- Sandpaper (medium and fine grit)
- Primer or wood sealer
- Paint in your chosen colors
- Paintbrushes or sponge brushes
- Stencils or painter’s tape (optional for designs or lettering)
- Decorative elements such as artificial flowers, ribbons, beads, or small wooden cutouts
- Hot glue gun and glue sticks
- Clear varnish or spray sealer
- Sawtooth hanger or Command strips for hanging
- Measuring tape and pencil
Step-by-Step Guide:
- Prepare Your Workspace: Find a well-ventilated area and cover your work surface with newspaper or a drop cloth to protect it from paint and glue.
- Shape and Smooth: If you’re starting with a raw wooden board, use a saw to cut it into your desired shape. Sand the edges and surfaces with medium-grit sandpaper to smooth out any rough spots, then follow up with fine-grit sandpaper for an even finish.
- Seal and Prime: Apply a coat of primer or wood sealer to your sanded piece. This step ensures better paint adhesion and protects the wood. Allow it to dry completely according to the manufacturer’s instructions.
- Paint Your Base: Once the primer is dry, it’s time to paint your door hanger. Use your chosen base color and apply it evenly with a brush or sponge. For best results, apply 2-3 thin coats, allowing each layer to dry before applying the next.
- Add Designs and Lettering: This is where you can get creative! If you want to add patterns, stencils or painter’s tape can help create clean lines. For lettering, trace out your design using a pencil first, then fill it in carefully. Alternatively, you could use letter stickers for a neater finish.
- Embellish to Perfection: Now comes the fun part – decorating! Attach artificial flowers, ribbons, beads, or any other trinkets you’ve gathered using a hot glue gun. Arrange and rearrange until you find the perfect layout, then securely adhere each element.
- Protect Your Work: To ensure your masterpiece lasts, seal it with a clear varnish or spray sealer. This will protect the paint and decorations from fading or chipping over time.
- Hang It Up: Finally, attach a sawtooth hanger or Command strips to the back of your door hanger. Measure and mark the spot on your door where you plan to hang it, ensuring it’s level and secure.
Conclusion
Voila! You now have a one-of-a-kind door hanger that not only greets visitors with warmth and personality but also reflects your unique taste and creativity. This DIY project is not just about enhancing your entryway; it’s also a therapeutic and satisfying experience that showcases what you can achieve with a little imagination and some elbow grease.
Remember, the beauty of DIY projects lies in their versatility. Feel free to experiment with different themes, colors, and materials to make your door hanger perfectly suited to your home’s aesthetic. Whether you opt for a rustic charm, modern minimalism, or a whimsical flair, your entryway will undoubtedly thank you for the stylish upgrade. Happy crafting!